
This guide outlines the step-by-step procedure for generating a new digital asset wallet within the Gambit Custody platform. Users can create standard hot wallets or choose to provision a cold storage framework depending on their enterprise configuration requirements.
Step 1: Open the Creation Interface
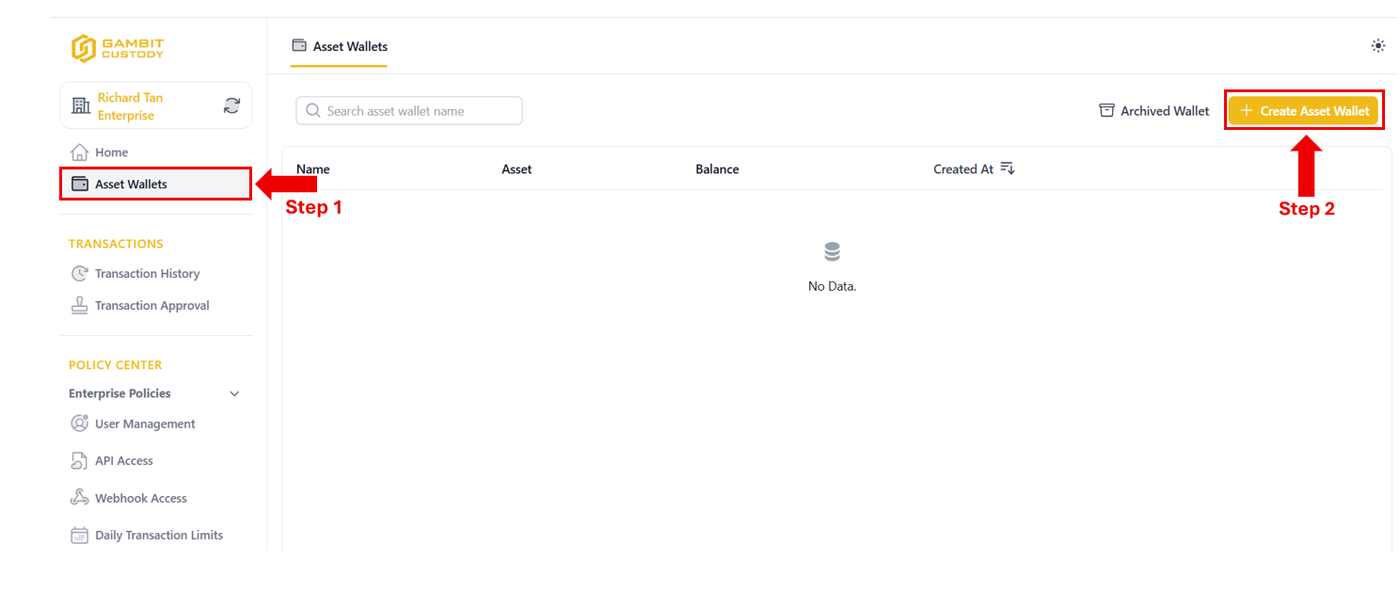
Navigate to the left-hand sidebar menu and click on the Asset Wallets tab.
From the main dashboard, click the amber + Create Asset Wallet button situated in the top-right corner.
💡 Note: If you need to view previously decommissioned facilities, the Archived Wallet repository button is located directly adjacent to the creation tool.
Step 2: Configure Wallet Parameters
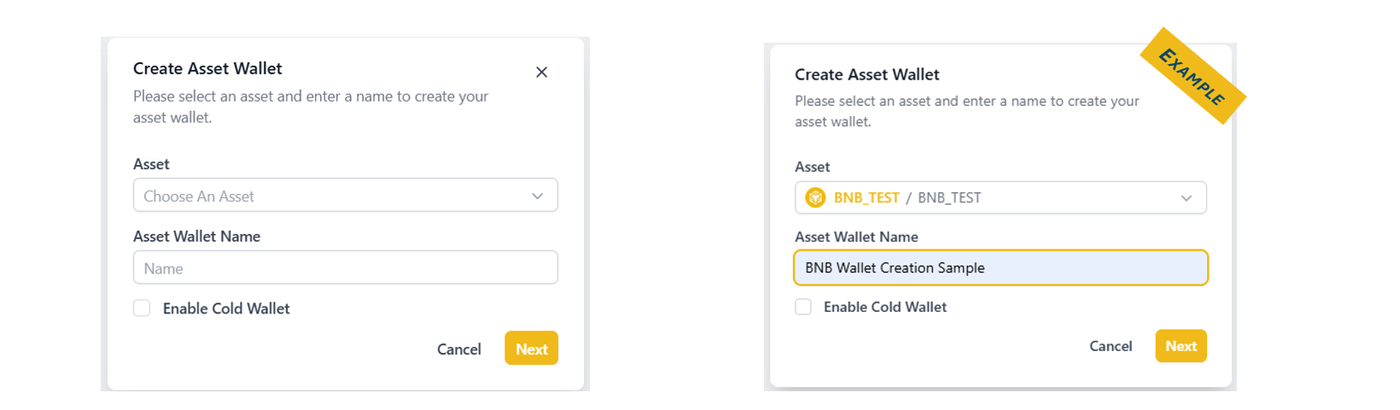
Upon clicking the button, a Create Asset Wallet pop-up modal will display. Complete the parameters as shown in the example:
Asset Selection: Click the Asset drop-down menu and choose your desired cryptocurrency or digital token
(e.g., BNB_TEST).Wallet Naming: Input a unique, recognizable identifier into the Asset Wallet Name field. It is best practice to name the wallet based on its functional operational purpose (e.g., BNB Wallet Creation Sample).
Security Architecture (Optional): If your enterprise security policy demands offline security architecture, you may opt to configure this allocation as a cold custody facility by ticking the Enable Cold Wallet checkbox.
Click the yellow Next button to advance.
Step 3: Verification of Successful Deployment
To verify deployment authority and secure the account ecosystem, the platform enforces a mandatory multi-factor validation check. Once authenticated, the system redirects back to the primary module window.
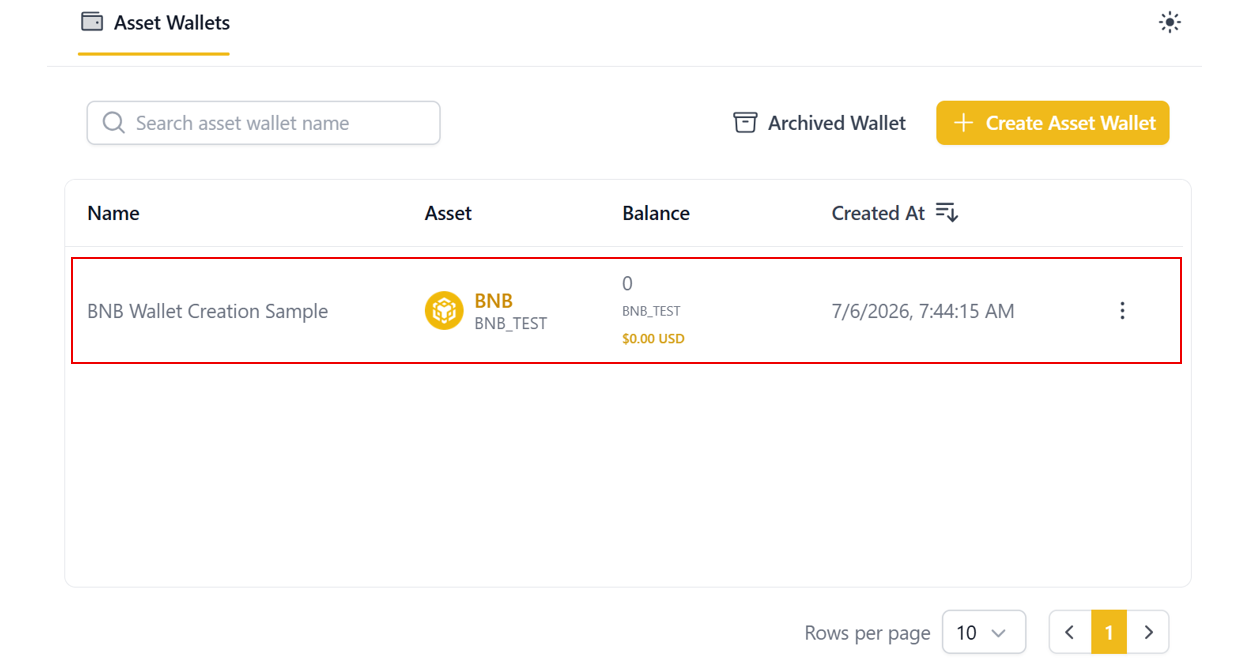
Your new allocation will appear dynamically within the tracking ledger, displaying:
The assigned Name (BNB Wallet Creation Sample).
The underlying Asset category type (BNB / BNB_TEST).
The real-time Balance status (defaulting to a starting position of
0tokens /$0.00 USD).A definitive chronological audit record under the Created At timestamp column.