

Initialization is the process of making a wallet fully functional so it can send and receive assets. Depending on the network type, this happens automatically or requires a quick manual setup:
EVM Chains: Deploys a forwarder contract. For non-native tokens, it also requires token approval to cover gas fees.
TVM Chains (e.g., TRON): Wallets are initialized automatically on creation—no manual action needed.
UTXO Chains (e.g., Bitcoin): Ready by default after basic address setup.
Other Chains: May require deploying a smart contract wallet before use.
When Do You Need to Initialize?
Use this table to quickly check if a wallet requires manual initialization:
Chain Type | Wallet Type | Manual Initialization? | Status on Creation | Action Required |
UTXO (e.g., Bitcoin) | All | ❌ No | Initialized | None. Ready by default. |
TRC (e.g., TRON) | All | ❌ No | Initialized | None. Handled automatically. |
EVM (Native Token) | Deposit | Yes | Uninitialized | Deposit native tokens into the Deposit Wallet and click "Initialize". (Fees deducted from Gas Station) |
Root / Cold | ❌ No | Initialized | None. Pre-initialized on creation. | |
EVM (Non-Native Token) | Deposit | Yes | Uninitialized | Deposit non-native tokens into the Deposit Wallet and click "Initialize". (Fees deducted from Gas Station) |
Root | Yes | Uninitialized | Run approve to let Gas Station cover fees. Deposit native tokens into the Root Wallet and click "Initialize". | |
Cold | ❌ No | Initialized | None. Pre-initialized on creation. |
Step-by-Step Instructions
Step 1: Select the Asset Wallet
Go to the left-hand sidebar menu and click on the Asset Wallets tab.
Locate your target wallet entry from the ledger list (e.g., Ethereum Wallet Creation Sample) and click directly on the wallet row to open its dashboard details.
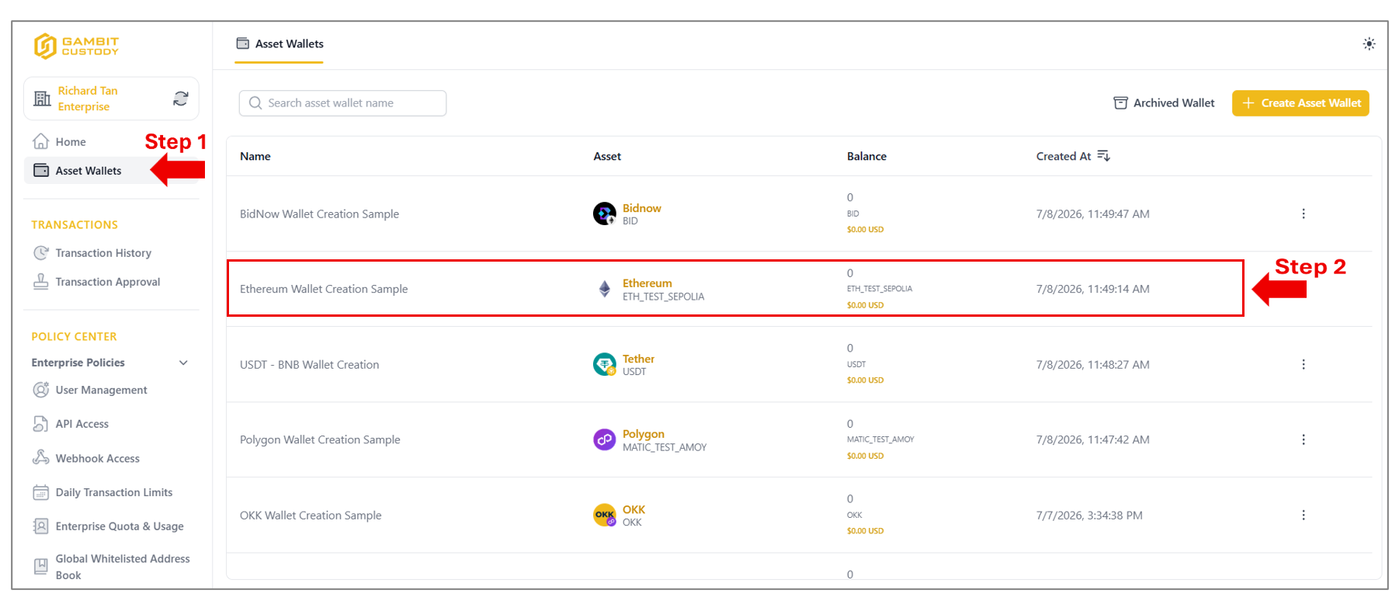
Step 2: Find the Wallet Pending Initialization
Scroll down to the main Wallet section.
Look for the wallet row showing a pending initialization status.
Click the white Initialize button next to it.
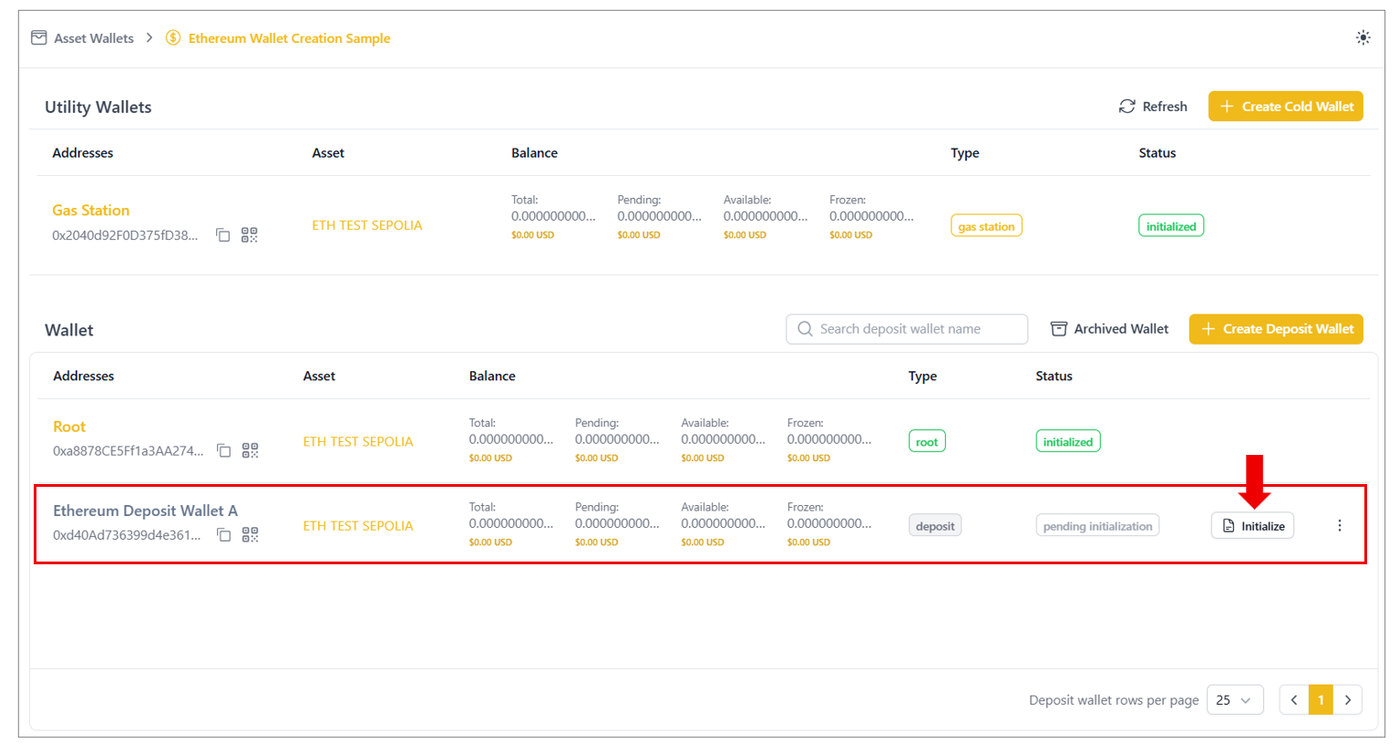
Step 3: Complete the Initialization Flow
Follow the short workflow below that matches your specific wallet and token type:
A. EVM (Native Token) – Deposit Wallet
Deposit native tokens into the Deposit Wallet.
Click "Initialize".
Note: The fee is taken automatically from your Gas Station balance (ensure it has a sufficient balance).
B. EVM (Non-Native Token) – Deposit Wallet
Deposit non-native tokens into the Deposit Wallet.
Click "Initialize".
Note: The fee is taken automatically from your Gas Station balance.
C. EVM (Non-Native Token) – Root Wallet
Deposit native tokens into the Root Wallet.
Click approve to allow the Gas Station contract to cover the gas fees.
Click "Initialize".
Note: The initialization fee is deducted directly from the Root Wallet.