
The Digital Asset Custody (DAC) portal provides two methods for adding secure target addresses to your system. Selecting the appropriate method depends on whether the destination address requires a brand-new asset category or fits cleanly within your pre-existing organization logic.
Method 1: Create New Whitelist Address Group
Use this approach if your new address requires unique classification parameters or different asset rules than your active lists. To use this method, please refer to our guide:
Create New Whitelist Address Group
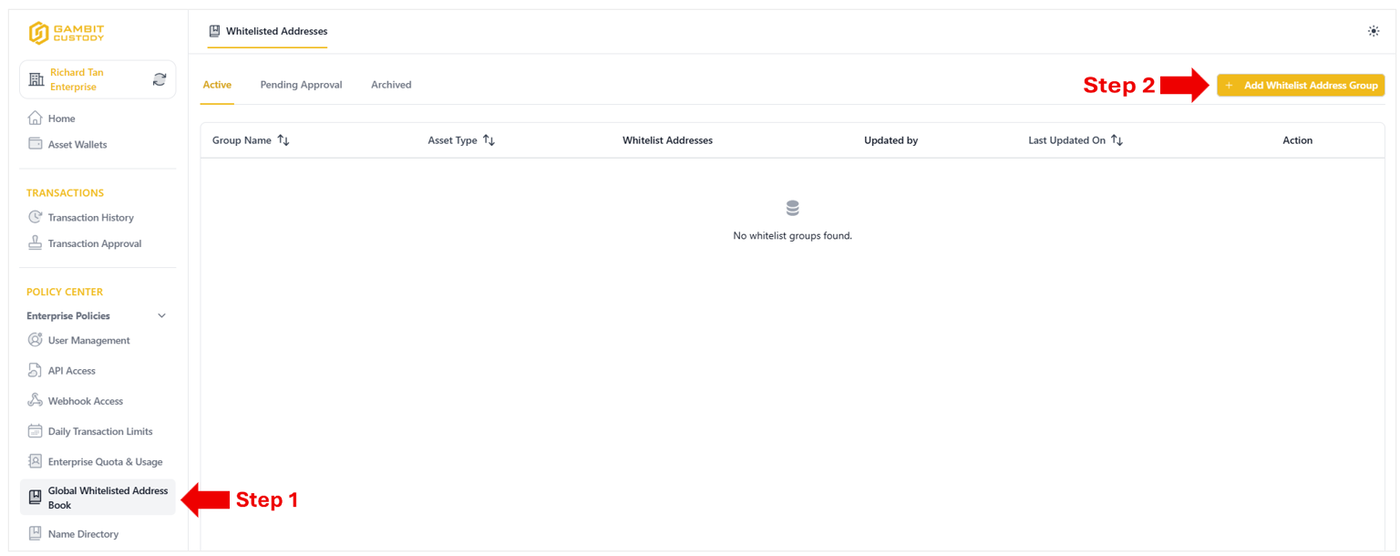
Step 1: Locate the Whitelist Group Management Feature
Navigate to the Policy Center section in the left sidebar menu.
Under the Enterprise Policies dropdown, select Global Whitelisted Address Book.
In the main management panel, click the yellow + Add Whitelist Address Group button.
Step 2: Configure Whitelist Group Parameters
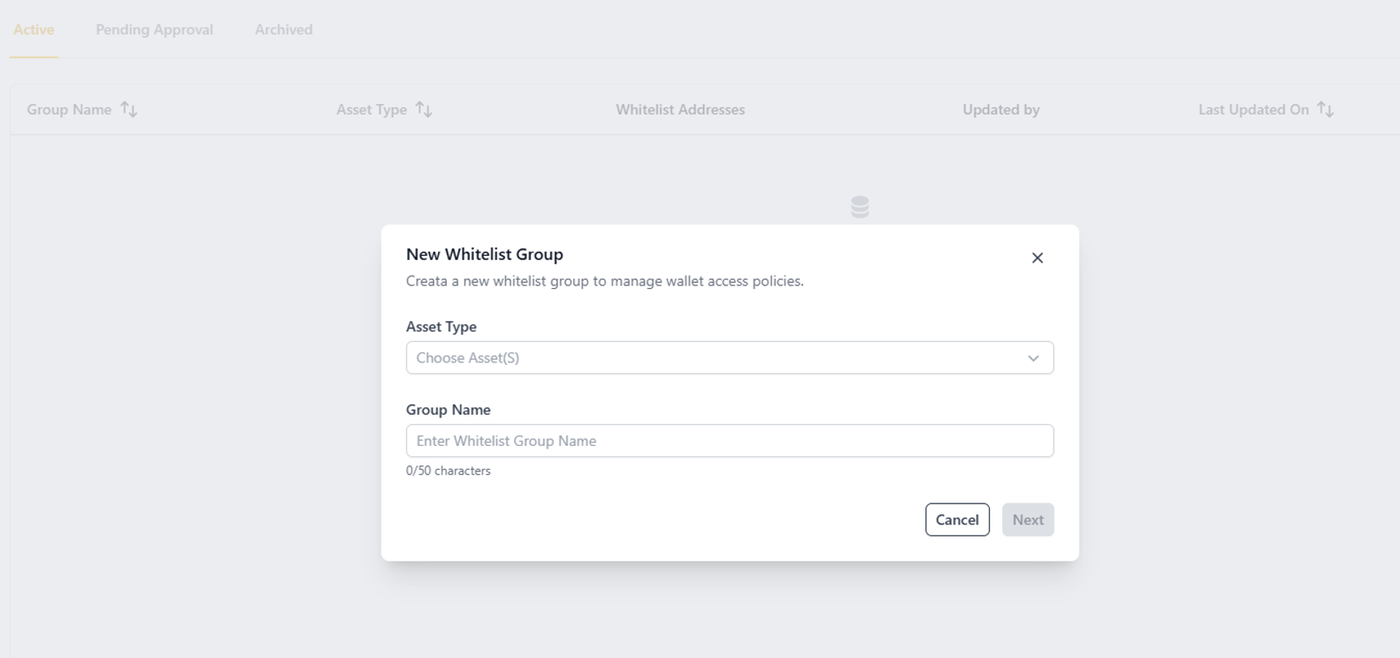
A configuration modal titled New Whitelist Group will appear. Complete the following fields:
Asset Type: Click the dropdown menu and select the specific cryptocurrency asset class that will apply to this group.
Group Name: Enter a unique, descriptive label for the whitelist group based on its operational purpose or department category.
Click Next to proceed.
Step 3: Populate Names and Wallet Addresses
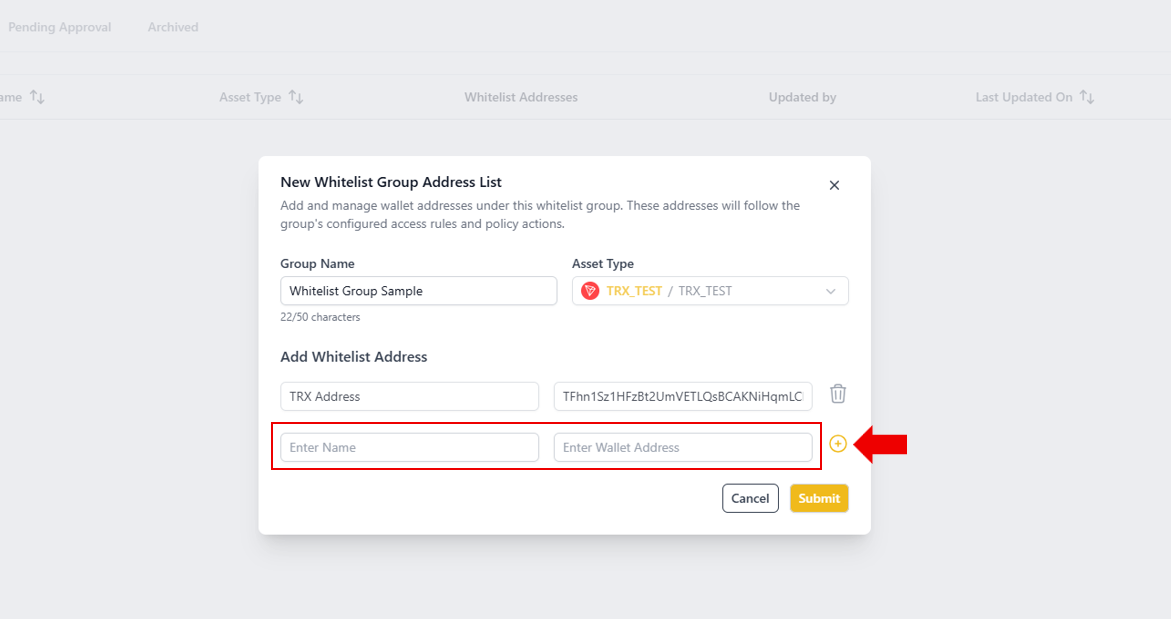
In the New Whitelist Group Address List window, input the designated address details:
Name Field: Assign a descriptive tag or nickname for this specific wallet address for easy reference.
Wallet Address Field: Enter or paste the complete external destination wallet address intended for whitelisting.
Click the yellow + icon to add the address to the group list. You may repeat this process to add multiple addresses to the same group.
Once your list is complete, click Submit. A Multi-Factor Authentication (MFA) window will prompt you; complete the verification process to finalize your submission.
Step 4: Awaiting Root Authorization
Upon successful completion of the MFA verification step, the new request will be submitted into the system ledger.
The submission will reside under the Pending Approval tab segment until it receives official authorization from the account's Root user.
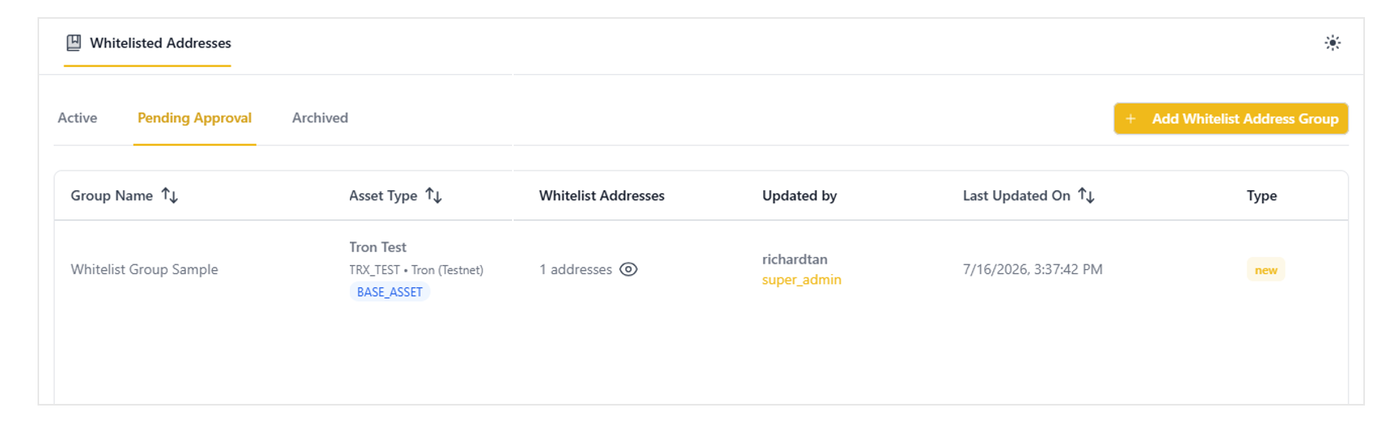
Step 5: Review and Approval by the Root User
Before the newly created whitelist group becomes functional, the designated Root user must formally authorize the pending request.
The Root user must log in to their respective account.
Navigate to the Global Whitelisted Address Book module under Enterprise Policies and open the Pending Approval tab ledger.
Locate the correct pending request row and click Approve (or Reject if the entry is unverified or incorrect).
Complete the required MFA confirmation step to execute the approval.
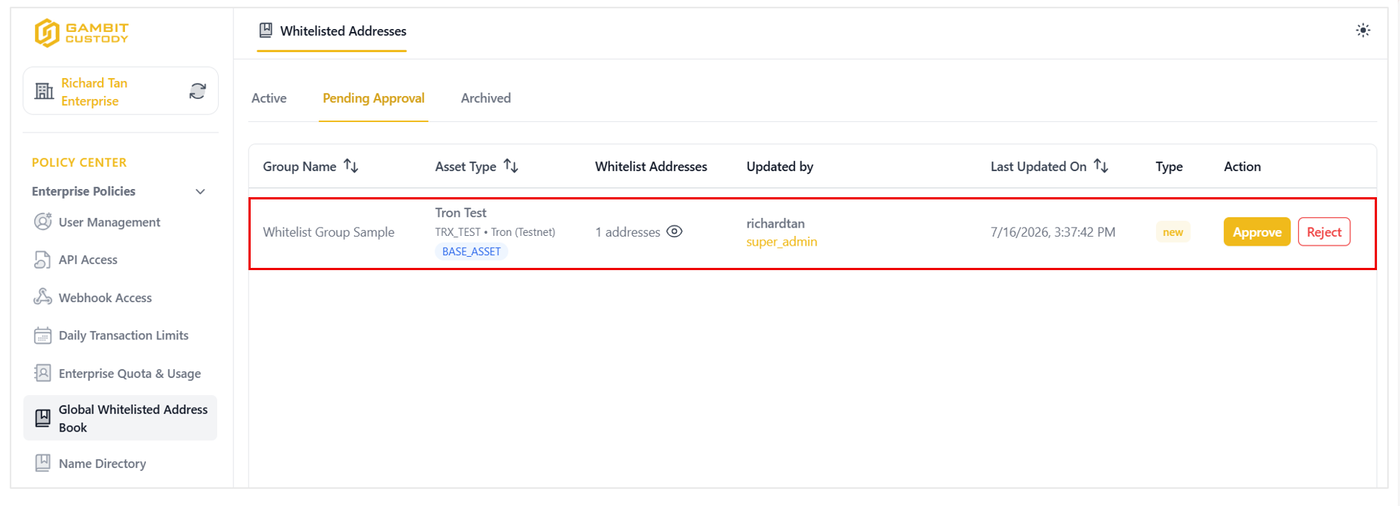
Step 6: Activation and Deployment
Following the Root user's final authorization and secondary MFA verification, the whitelist group's status will update immediately.
The newly authorized group will migrate to the Active tab ledger, rendering the addresses fully available and authorized for secure enterprise transactions.
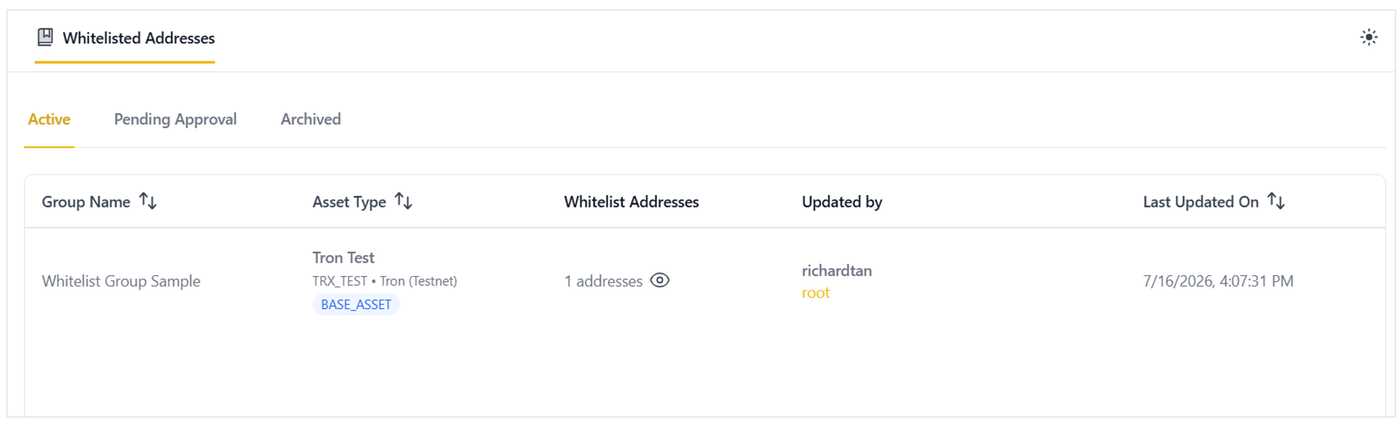
Method 2: Appending an Address to an Existing Group
If the new wallet address belongs to an existing group, you can append it directly to that group. This allows you to bypass initial asset configuration steps by following the instructions below.
Step 1: Access the Whitelist Addresses Ledger
Locate the Policy Center section in the left sidebar menu.
Under the Enterprise Policies dropdown, select Global Whitelisted Address Book.
Locate the target whitelist group within the Active ledger.
Click the action button (three vertical dots) on the far right of the row and select Edit.
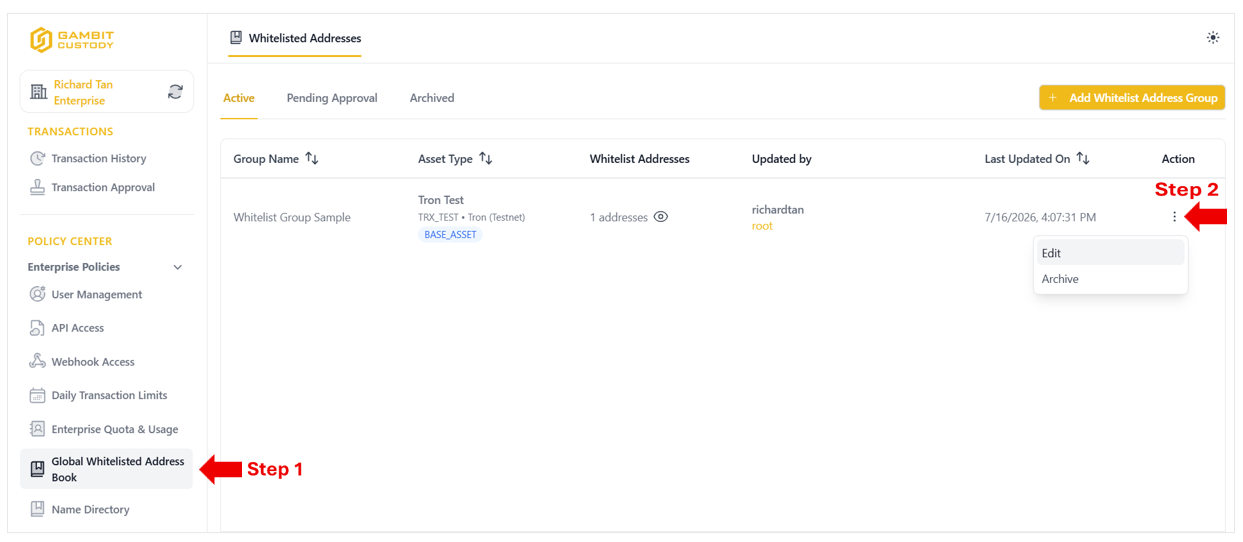
Step 2: Input Details and Submit
In the edit modal, navigate to the empty row at the bottom of the address list.
Enter a descriptive nickname in the Name field for easy identification.
Input or paste the complete destination link into the Wallet Address field.
Click the yellow + icon to append it to the group list, then click Submit.
Complete the Multi-Factor Authentication (MFA) verification prompt to send the update request.

Step 3: Awaiting Root Authorization
After completing the initial MFA verification, the modification request is logged into the ledger.
The request status will appear under the Pending Approval tab segment until authorized by the enterprise Root user.
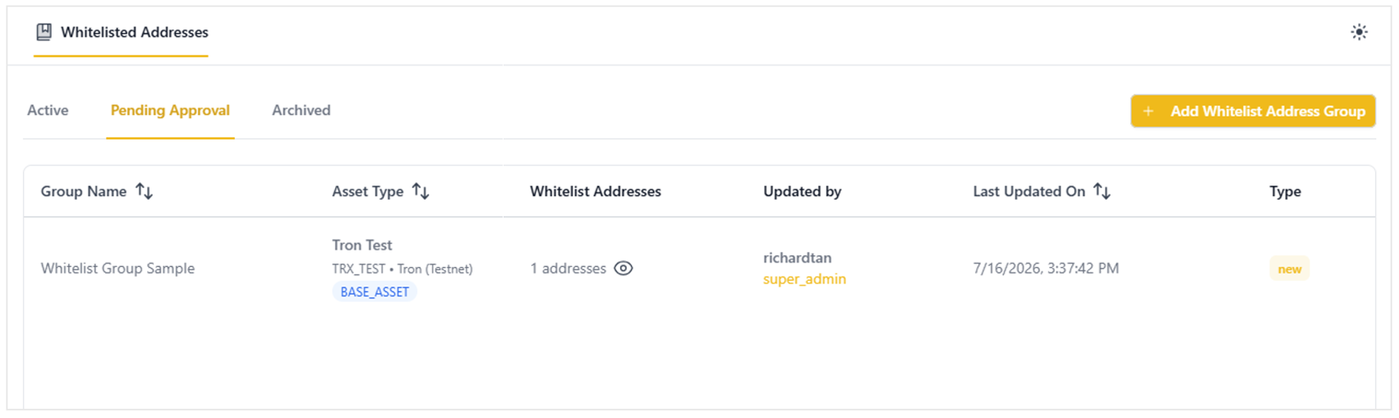
Step 4: Review and Approval by the Root User
The Root user must log in to their account.
Navigate to the Global Whitelisted Address Book and open the Pending Approval tab ledger.
Locate the correct entry row, review the details, and click Approve (or Reject if the modification is unauthorized).
Complete the required secondary MFA verification to confirm the change.
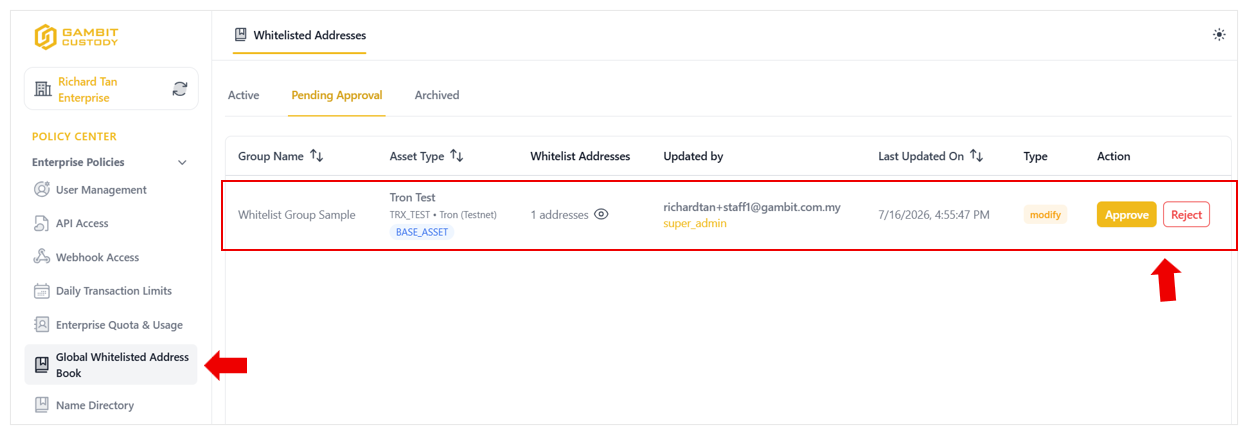
Step 5: Final Activation and Deployment
Following the Root user's final authorization, the address changes take effect immediately.
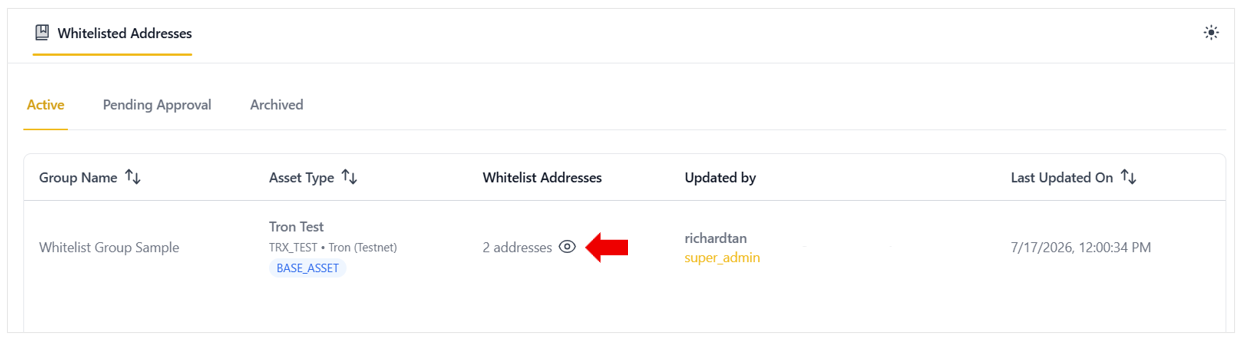
The updated group will return to the Active tab ledger view. You can click the eye icon in the Whitelist Addresses column to view the complete listing details and confirm the deployment.