
Enterprise users can update the status of any registered webhook endpoint to pause or resume automated notifications without needing to delete and recreate the webhook configuration.
Permission Matrix Breakdown
Before proceeding, please review the operational authority boundaries defined below:
Role | Can Update Webhook Status? |
|---|---|
Root Admin | ✅ Yes |
Super Admin | ✅ Yes |
Standard User | ❌ No |
How to Update Webhook Status
Step 1: Locate the Target Webhook
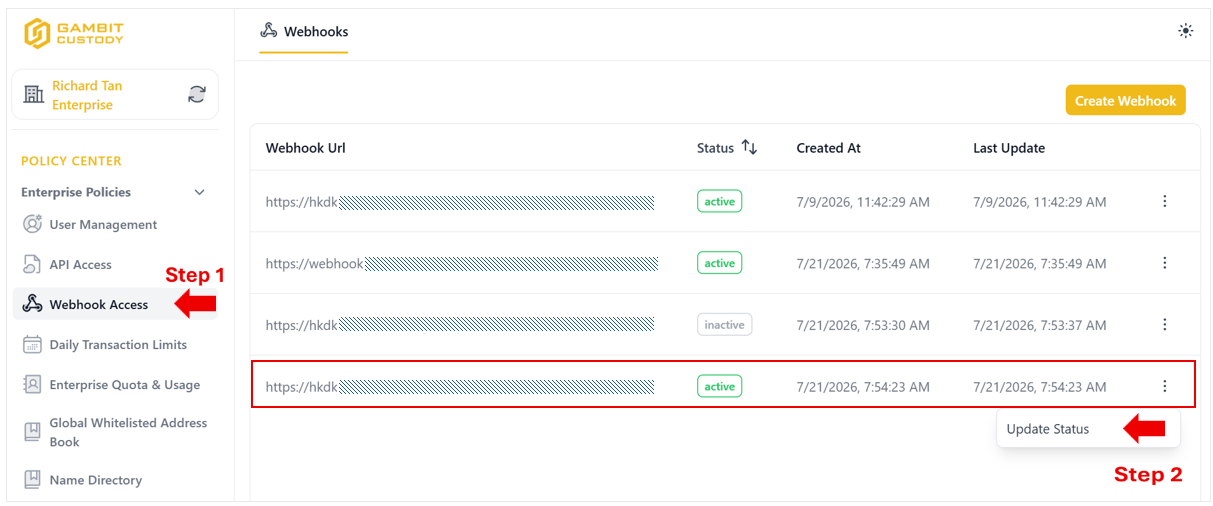
From the left navigation menu, navigate to Policy Center > Enterprise Policies > Webhook Access.
Identify the target Webhook URL you wish to modify within the table.
Click the three-dot action menu ( ⋮ ) on the far right side of the corresponding row and select Update Status.
Step 2: Configure and Confirm Status Change
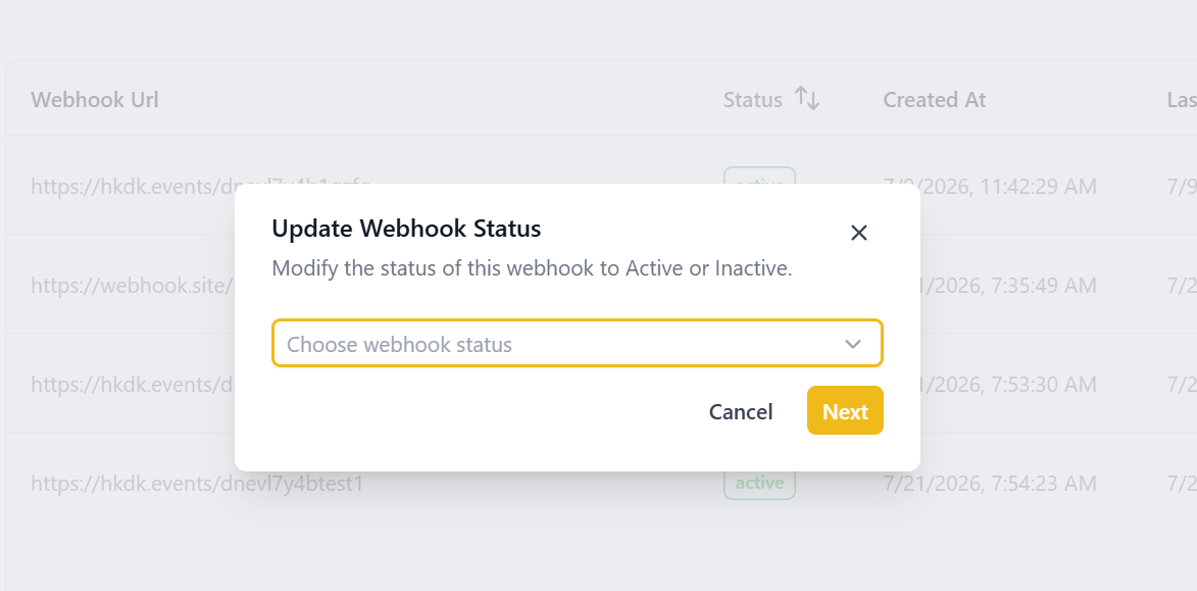
In the Update Webhook Status modal, click the Choose webhook status dropdown menu.
Select the desired operational state:
ACTIVE: Enables real-time event notifications to be dispatched to this URL.
INACTIVE: Pauses event delivery without deleting the webhook configuration from your list.
Click Next and complete the required multi-factor authentication (MFA) step to confirm your changes.
Step 3: Verify Status Update
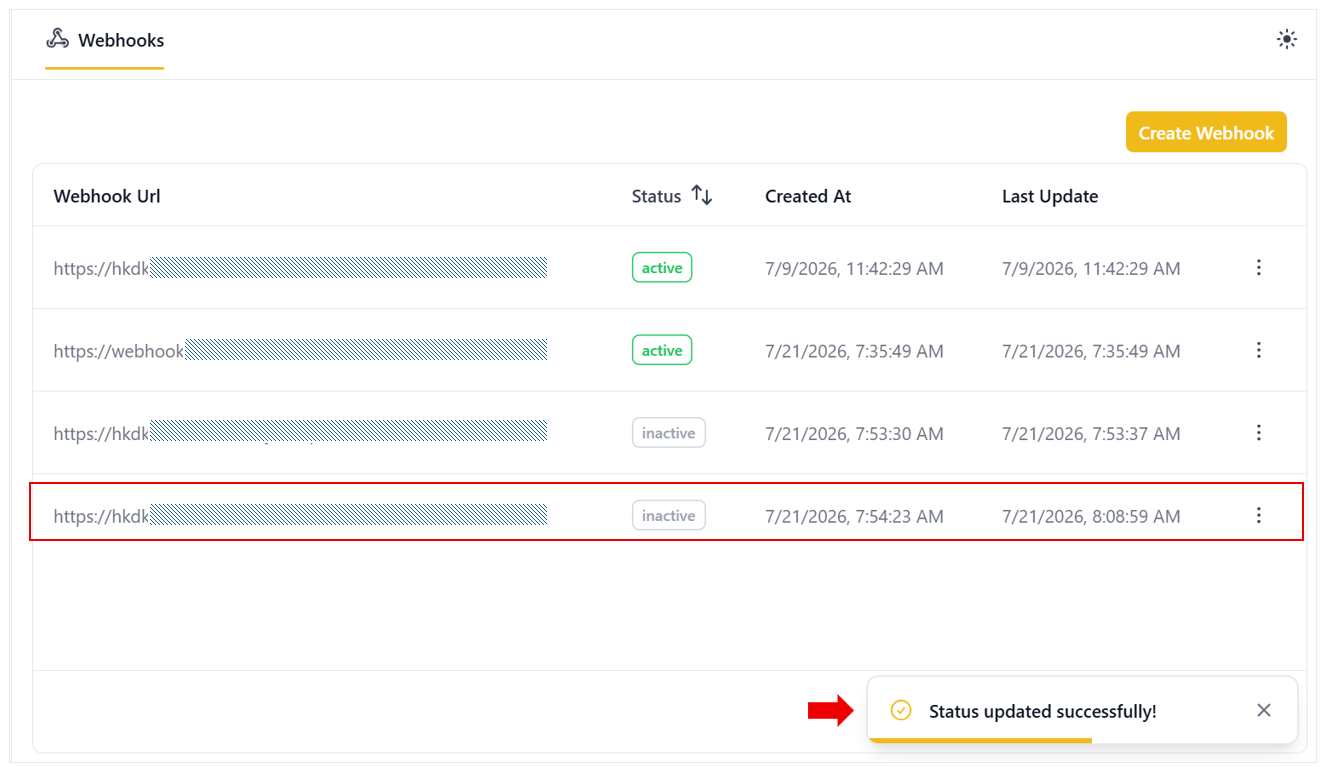
Once confirmed, a toast banner stating "Status updated successfully!" will appear in the bottom right corner.
The webhook's status badge will immediately reflect its new state (Active or Inactive).
The Last Update column will refresh to display the exact date and timestamp of the modification.