
Archiving allows enterprises to safely deactivate counterparty profiles that are no longer in use, ensuring that transaction selections remain clean, accurate, and up to date. Archiving an entry also frees up the enterprise’s directory usage quota while keeping historical record data intact for compliance auditing.
🔒 Policy Note: To maintain top-tier institutional security, creating or modifying a whitelisted address group follows a dual-authorization workflow. A new setup requires an initial configuration submission by an authorized administrator followed by mandatory final approval from the enterprise's Root user.
Role | Access |
|---|---|
Root Admin | ✅ View & Approve changes |
Super Admin (all) | ✅ View, Add & Archive (Root approval required) |
User (all) | ❌ No access |
How to Archive a Name Directory Entry
Step 1: Submit an Archive Request
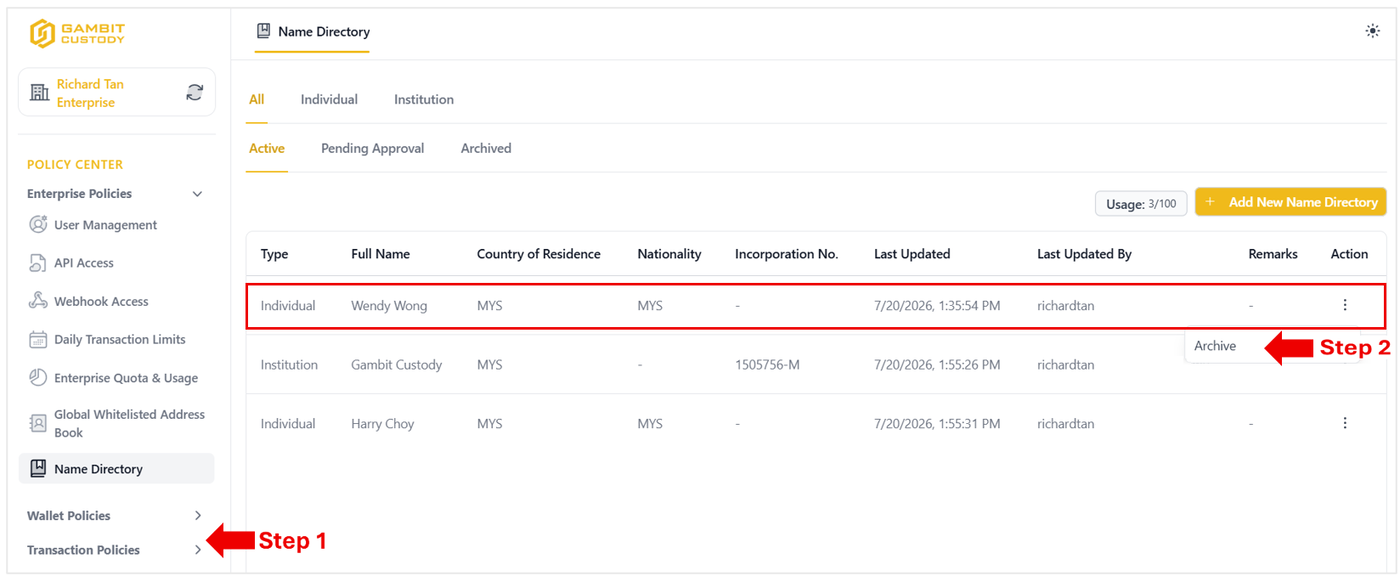
From the left sidebar, navigate to Policy Center > Name Directory.
Under the Active tab, locate the counterparty entry you wish to archive.
Click the three-dot action menu ( ⋮ ) on the far right side of the row.
Select Archive from the dropdown menu to initiate the archive request.
Step 2: Review and Approval by Root Admin
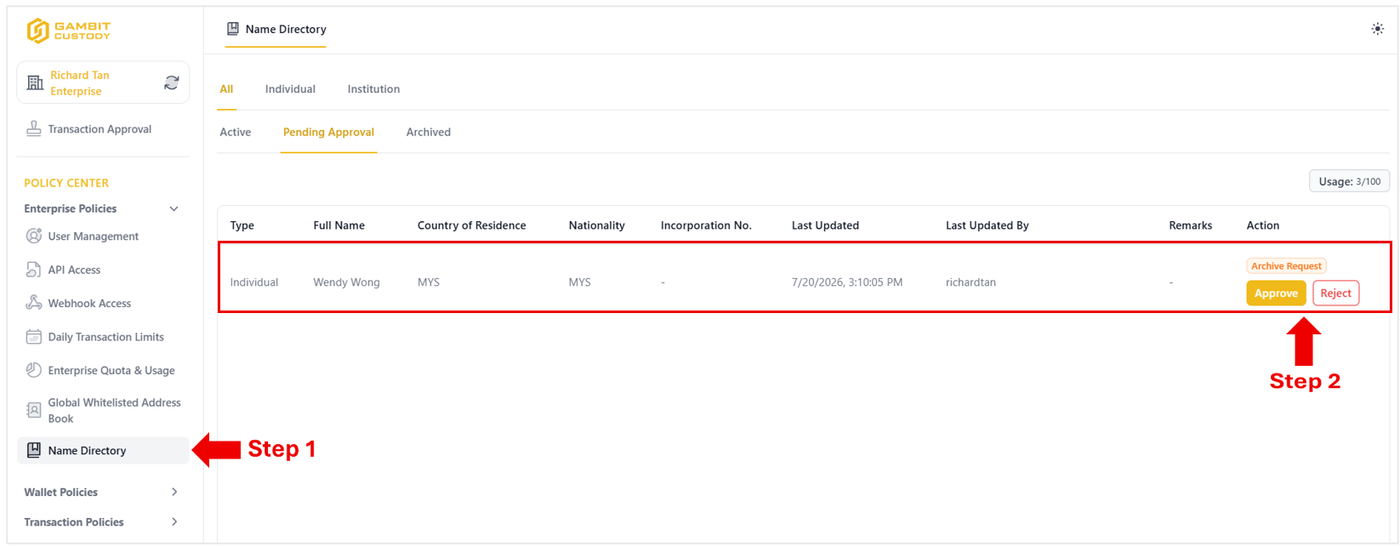
Once requested, the entry will move to the Pending Approval tab marked with an Archive Request tag.
A Root Admin must navigate to Policy Center > Name Directory and select the Pending Approval tab.
Locate the pending entry and click Approve (or Reject to cancel the request) under the Action column.
Step 3: View Archived Entries
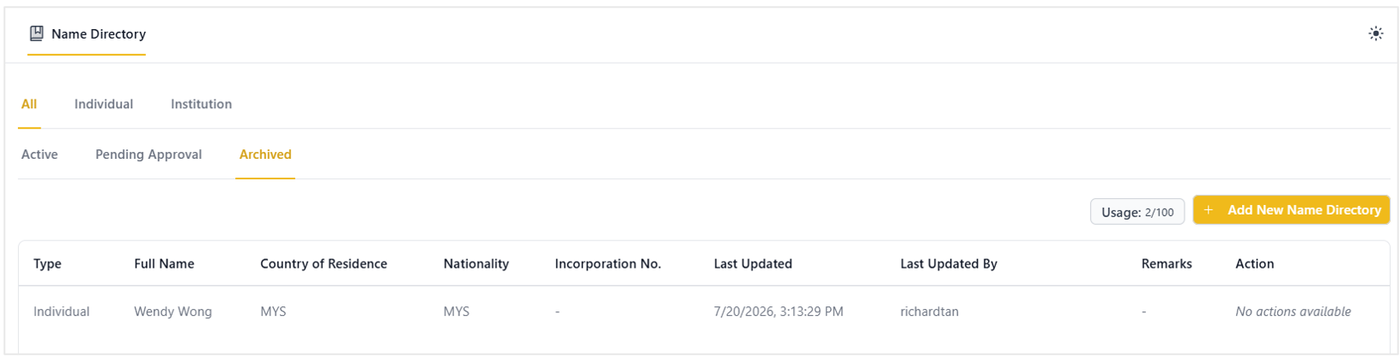
Upon Root Admin approval, the entry is officially deactivated and transferred to the Archived tab.
The active entry quota counter will automatically update to reflect the newly freed slot (e.g., usage decreases from 3/100 to 2/100).
Archived entries are preserved for historical record-keeping but will no longer be available for selection during active transactions.