
Gas stations are system wallets that hold gas (network fees) to power your enterprise wallets. Without enough gas, your wallets cannot process transactions.
The Gas Station Threshold and Wallet Refuel Setting allows you to configure automatic refueling — so that when a wallet's gas balance drops too low, the system tops it up automatically from the gas station without any manual action needed.
🔒 Policy Note: To maintain top-tier institutional security, creating or modifying a whitelisted address group follows a dual-authorization workflow. A new setup requires an initial configuration submission by an authorized administrator followed by mandatory final approval from the enterprise's Root user.
Role | Access |
|---|---|
Root Admin | ✅ View & Approve changes |
Super Admin (all) | ✅ View & Initiate changes (Root approval required) |
User (all) | ❌ No access |
Viewing Your Gas Stations
Log in to the Enterprise Portal.
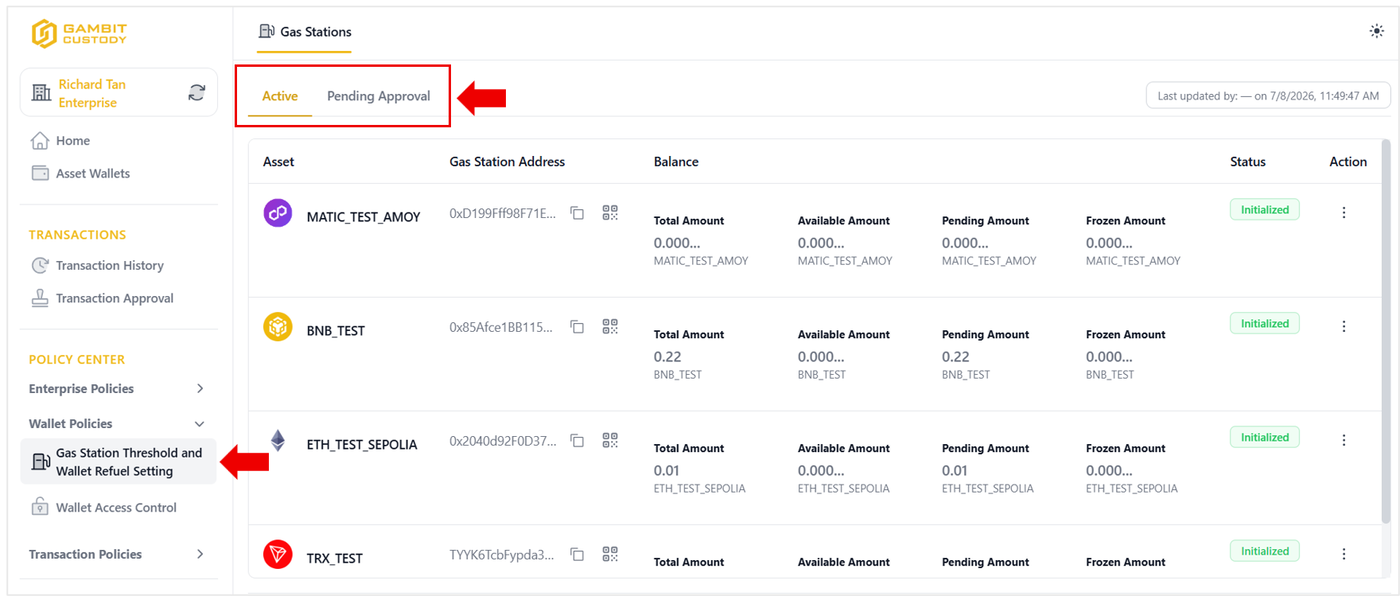
From the left-hand sidebar, go to POLICY CENTER → Wallet Policies → Gas Station Threshold and Wallet Refuel Setting.
The Gas Stations page will load, showing all active gas stations for your enterprise.
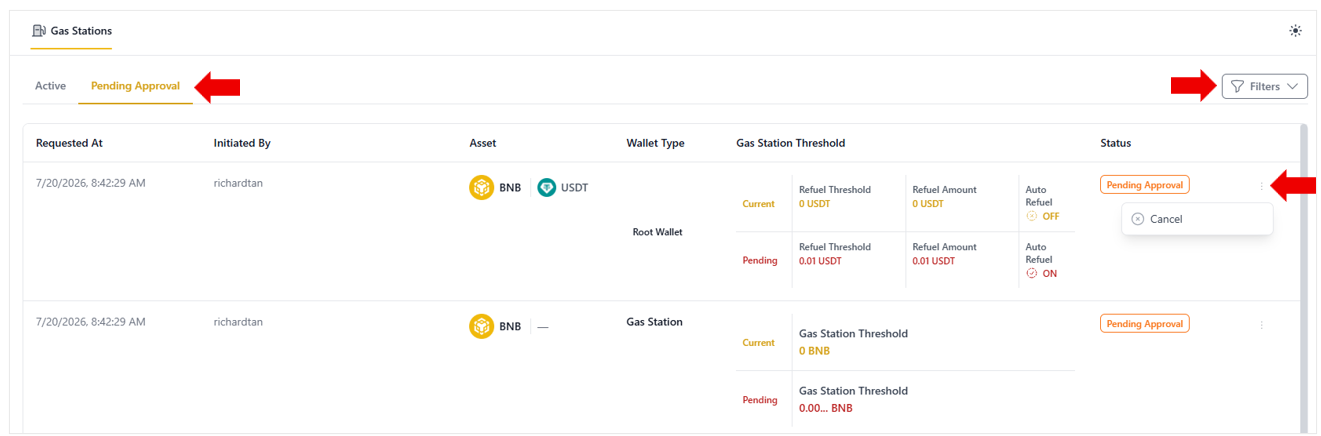
You can switch between the Active and Pending Approval tabs to see confirmed settings versus changes awaiting Root Admin approval.
Understanding the Gas Stations Table
Column | What It Means |
|---|---|
Asset | The cryptocurrency asset the gas station supports (e.g. ETH, BNB, MATIC) |
Gas Station Address | The wallet address of the gas station. Click the copy or QR icon to share it. |
Total Amount | Total gas balance in the gas station |
Available Amount | Gas available for immediate use |
Pending Amount | Gas tied up in pending transactions |
Frozen Amount | Gas that is currently locked or frozen |
Status | Current state of the gas station (e.g. Initialized) |
Action | Click the ⋮ menu to configure threshold and refuel settings |
Configuring Gas Station Threshold and Refuel Settings
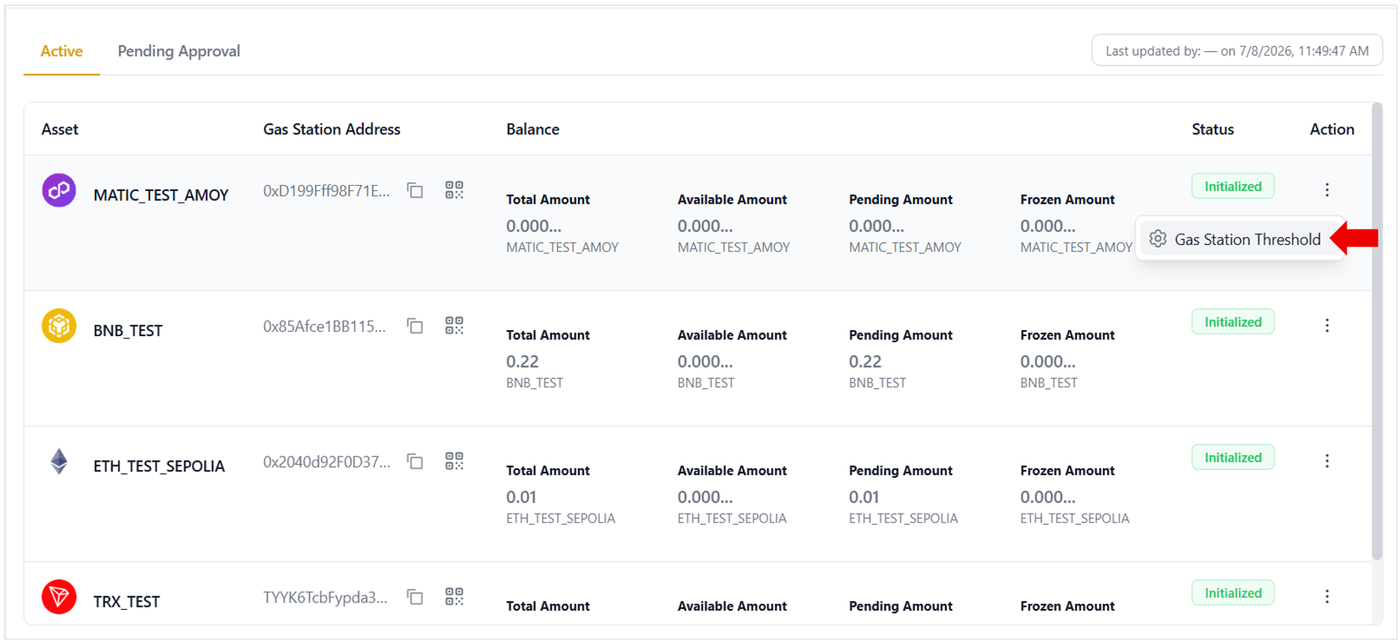
On the Gas Stations page, locate the asset you want to configure.
Click the ⋮ (three-dot) Action menu on the right of the asset row.
Select Gas Station Threshold — a settings panel will appear.
Section 1: Gas Station Threshold
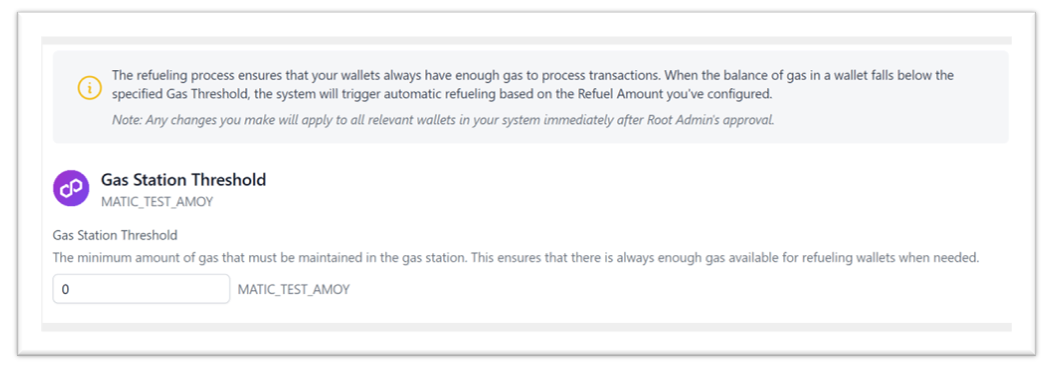
This sets the minimum gas balance the gas station must maintain at all times. Enter your desired minimum amount in the input field and select the asset unit.
Field | What It Means |
|---|---|
Gas Station Threshold | The minimum amount of gas that must be kept in the gas station. If it falls below this level, the system ensures there is still enough gas available for refueling wallets. |
Section 2: Wallet Refuel Settings
This section controls how and when individual wallets get automatically topped up with gas.
Field | What It Means |
|---|---|
Gas Refuel Threshold | The minimum gas level a wallet must fall below before automatic refueling is triggered. |
Gas Refuel Amount | The amount of gas that will be added to the wallet each time it is refueled. |
Gas Refuel Toggle | Turn this ON to enable automatic refueling. If OFF, no automatic refueling will happen even if the wallet balance is low. |
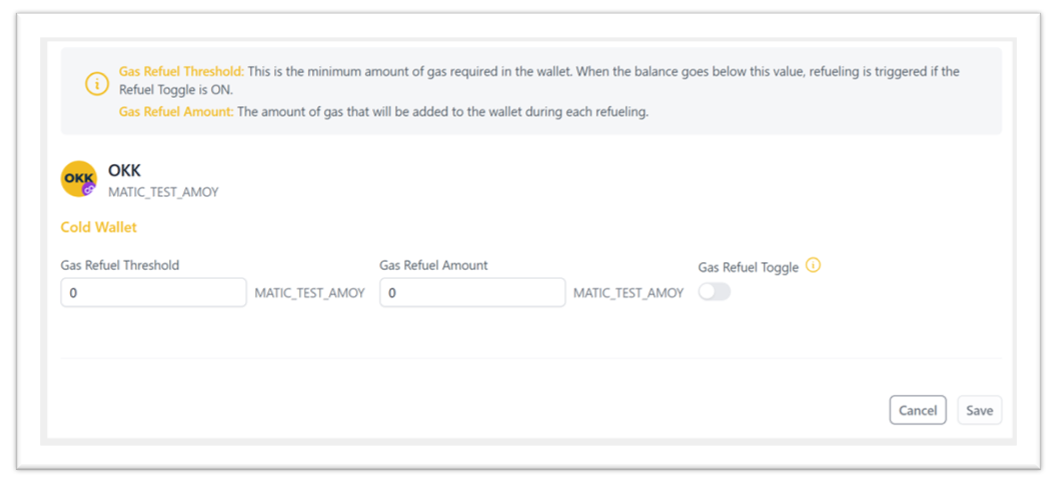
⚠️ Important: Make sure the Gas Refuel Toggle is set to ON if you want automatic refueling to work. If the toggle is OFF, the system will not top up wallets even if they fall below the threshold.
Submitting Your Changes
Once you have configured the threshold and refuel settings:
Review all values carefully and click the Save button.
Complete the mandatory Multi-Factor Authentication (MFA) verification process for security purposes.
The submitted request will appear under the Pending Approval tab ledger until the Root Admin reviews and authorizes the changes.
Once approved, the new settings will be applied to all designated wallets immediately.
Managing Pending Requests
While your configuration requests are awaiting authorization in the ledger ledger, you can use the following interface features:
Filter Requests: Utilize the Filters dropdown button located in the top-right corner of the ledger to quickly sort, locate, or narrow down specific pending configurations.
Cancel Request: If you need to withdraw a modification before it is reviewed, click the action button (three vertical dots) on the far right of the target entry and select Cancel from the pop-up menu.